Names & settings
Everything is set up with clicks — there are no files to edit.
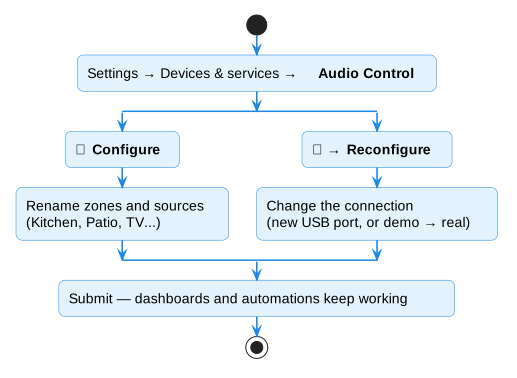
Rename zones and sources
Out of the box the zones are called Zone 1, Zone 2… and the sources Source 1, Source 2…. Give them real names:
- Settings → Devices & services → Audio Control.
- Click the gear icon (Configure) next to your amplifier.
- Type the new names — for example Kitchen, Patio, TV, Streamer — and click Submit.
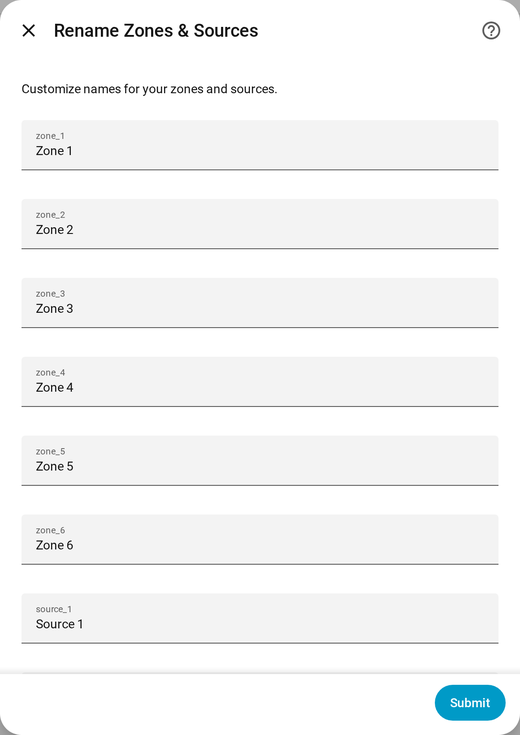
The new names appear on the zones and in each zone's source list.
Amplifier with a password?
A few amplifiers (for example RTI) need a username and password. Enter them on the same screen. Leave the boxes empty to keep what's stored.
Change the connection
Moved the adapter to another USB port, or switching from demo to the real
amplifier? You don't need to start over:
- Settings → Devices & services → Audio Control.
- Click ⋮ next to your amplifier → Reconfigure.
- Enter the new Connection and click Submit.
Your zones, names, dashboards and automations stay exactly as they were.
Connection types
| You have | Enter in Connection |
|---|---|
| USB adapter on the Home Assistant machine | /dev/serial/by-id/usb-... (how to find it) |
| Amplifier or adapter on the network | socket://192.168.1.50:4999 (its address and port) — see Network connections |
| Nothing yet — just trying it | demo |